

Tired of scraping your vehicle’s bumper on your driveway’s curb? Worry no more! This ultimate curb ramp DIY guide will walk you through the process of creating your own driveway curb ramp. From material selection to installation and maintenance, we’ve got you covered. By the end of this guide, you’ll have all the information you need to construct a custom curb ramp tailored to your driveway’s specific needs.
In the following sections, we’ll discuss various materials, such as concrete, wood, and steel, along with their respective pros and cons. Then, we’ll dive into the essential tools and supplies you’ll need, followed by a step-by-step guide to building a concrete curb ramp. Finally, we’ll explore customization options, safety considerations, and maintenance tips to ensure your curb ramp DIY project stands the test of time.
Key Takeaways
Learn the pros and cons of DIY curb ramp materials, such as concrete, wood, steel & rubber.
Understand essential tools and supplies for construction plus step-by-step guide to build a concrete curb ramp.
Take into account safety considerations & legal compliance when constructing your own DIY curb ramp with rubber being the best option due to its accessibility, durability & easy installation.
DIY Curb Ramp Materials: Pros and Cons
Driveway curb ramps can be made from various materials, each presenting unique benefits and challenges. Concrete, wood, and steel are the most commonly used materials for DIY curb ramps, especially for those with a steep driveway. Selecting the right material will depend on factors such as your vehicle’s weight, tire size, and the slope of your driveway. The following paragraphs will scrutinize each material thoroughly.
While concrete, wood, and steel curb ramps can help access your garage, they may not suit every circumstance. As we’ll see later, rubber curb ramps offer a durable, easy-to-install alternative that works well for most driveways.
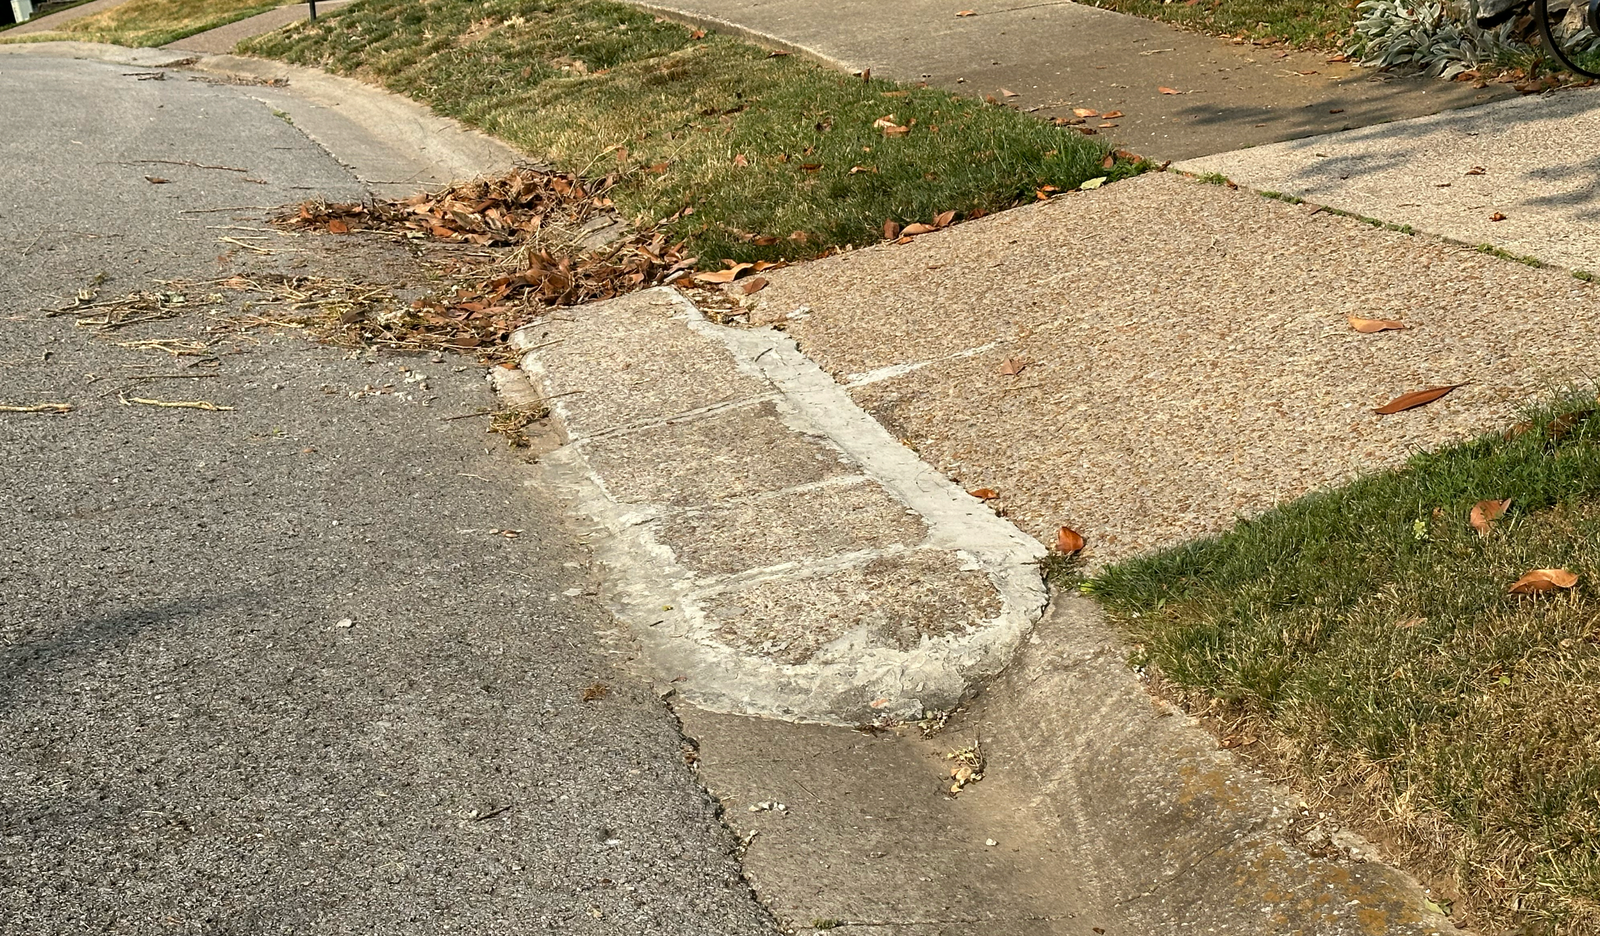
Concrete Curb Ramps
Concrete is known for its strength and durability, making it an ideal choice for a DIY curb ramp, particularly for lowered cars. However, concrete ramps have their limitations in terms of durability and safety. Weather conditions can significantly impact the lifespan of a concrete curb ramp, which is generally estimated to be approximately 25 years. Freezing temperatures, high heat, heavy rain, or snow can cause the concrete to expand, contract, or erode, leading to cracks and other damage.
Potential safety concerns associated with concrete curb ramps include:
Spalling or breaking off of the edges
An unappealing appearance
Difficulty in repairs
Maintenance issues caused by expansion of asphalt
Trip and fall hazards from uneven pavement
Potential risks for people with disabilities
Maintaining your concrete curb ramp properly and safeguarding it from severe weather conditions is key to its longevity and safety.
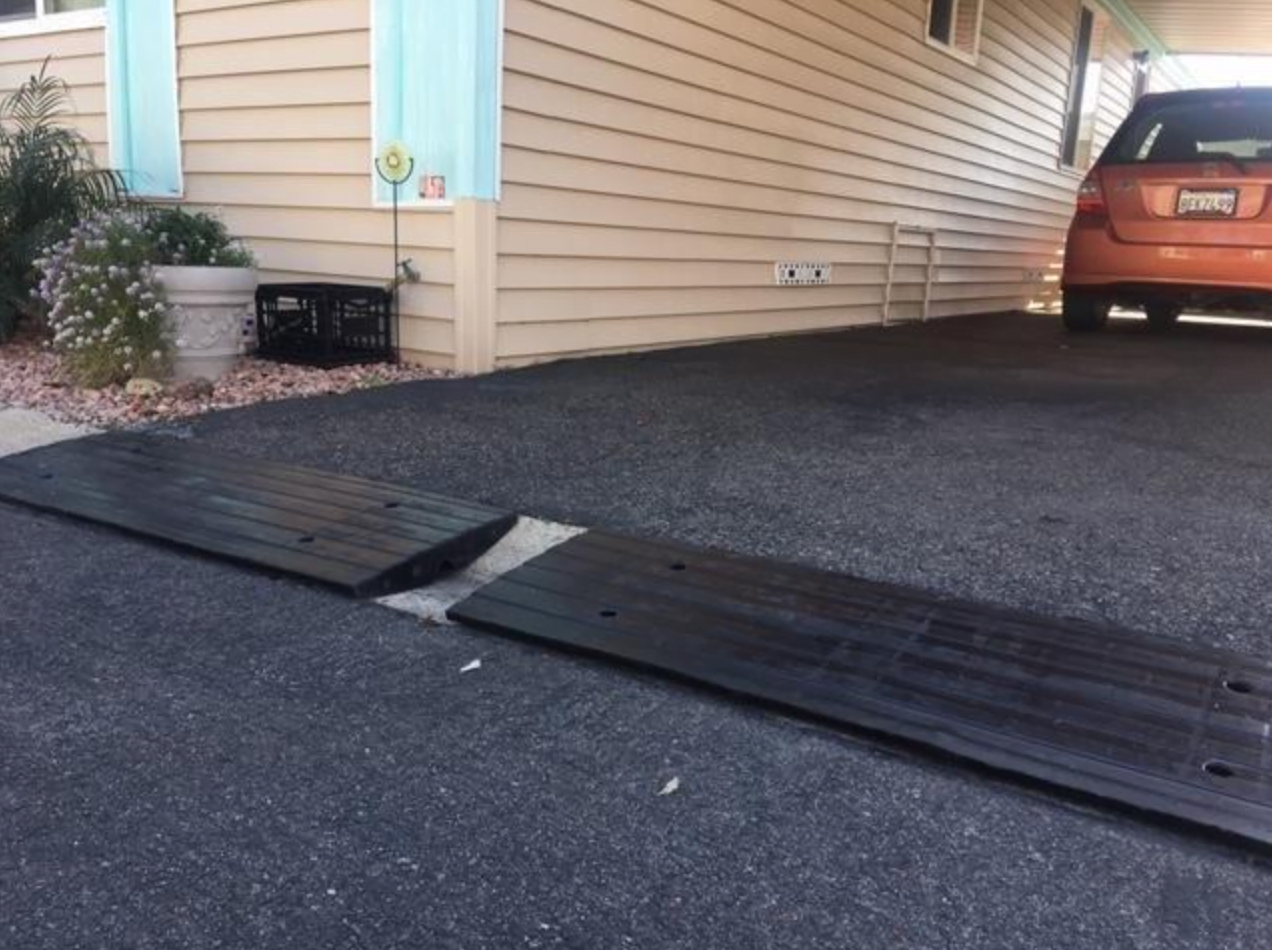
Wooden Curb Ramps
Wooden curb ramps, typically constructed from wood boards, offer an economical and straightforward option for DIY driveway ramps. Some considerations for wooden curb ramps include:
Pine boards are a viable option for DIY curb ramps, while MDF boards should be avoided.
Wood is lightweight and easy to install, and can be painted to complement round curbs.
However, wood is not as resilient as concrete and may deteriorate over time, making it less suitable for situations where you can’t simply lift the ramp and replace it.
Common issues associated with wooden curb ramps include deterioration due to weather conditions and heavy use, improper slope of side flares, and difficulty in visibility. Regular maintenance of curb ramps, ensuring appropriate slope of side flares, and using paint or other aids for visibility can help avoid these problems.
Applying treatments like:
sealer
stain
paint
grip tape
Wood blocks can help protect the wood from UV light, fungus growth, and moisture damage, bolstering the durability of wooden curb ramps in varying weather conditions.
Steel Curb Ramps
Steel curb ramps are lightweight and easy to install, making them a popular choice for DIY driveway ramps. They can be painted to coordinate with the curb and are particularly suitable for driveways that span a few feet. However, steel is not as resilient as concrete and can corrode over time, especially when used for driveway ramps that span a few feet. Furthermore, steel curb ramps are cost-prohibitive, susceptible to rust and corrosion, hazardous to service vehicles, and produce a considerable amount of noise.
To protect a steel curb ramp from rust and corrosion, galvanized steel is recommended. Galvanization creates a protective layer on the steel surface, thus preventing rust and corrosion and ensuring the longevity and durability of the curb ramp. Keeping the ramp well-maintained and devoid of snow, ice, dirt, and leaves is significant to ensure safe access regardless of the weather conditions.
Essential Tools and Supplies for DIY Curb Ramp Construction
Having discussed the various materials for DIY curb ramps, let’s acquaint ourselves with the indispensable tools and supplies required for curb ramp construction. These include:
Measuring tape
Level
Chalk line
Plumb bob
String
One-by-six wood planks
Nails
Hammer
Stakes
Saw
Masonry saw blade
3/8-inch rebar
Medium bristle broom
Concrete
Concrete mixer
Gloves
Rubber boots
Edging trowel
Wood floats
Steel trowel
Two-by-four wood screeds
Each of these tools and supplies plays a vital role in the construction process. For example, the measuring tape can be used to measure the length of the driveway curb and the depth of the gap for estimating the amount of curb filler needed in DIY curb ramp construction. The level is employed to guarantee that the ramp is built with the correct slope and is level, providing a seamless transition from the curb to the driveway.
The forthcoming segments will walk you through the process of constructing a concrete curb ramp in stages, explaining the use of these tools and supplies.
Step-by-Step Guide to Building a Concrete Curb Ramp
Ready to construct your own concrete curb ramp? Follow this step-by-step guide that covers everything from planning and measuring to finishing the surface. By the end of this guide, you’ll have a sturdy and durable concrete curb ramp that will make accessing your driveway a breeze.
Key steps in constructing a concrete curb ramp include:
Planning and measuring
Site preparation
Formwork construction
Concrete mixing and pouring
Surface finishing
In the next few sections, we’ll walk you through each of these steps in detail, providing you with the knowledge and confidence to build your very own concrete curb ramp.
Planning and Measuring
The first step in constructing a concrete curb ramp is planning and measuring. Begin by determining the area where the ramp will be installed, taking into account factors such as the size of your vehicle, the slope of your driveway, and any landscaping features that may need to be accommodated. The primary ramp area must adhere to a 1:12 gradient and measure 48 inches in width.
To accurately assess the area of a curb ramp, it is recommended to take at least two measurements of the ramp cross slopes parallel to the grade breaks at the top and bottom of the ramp, as well as the width of the ramp section. This guarantees the ramp is built with the accurate slope and dimensions, enabling a smooth and safe transition from the curb to your driveway.
Preparing the Site
Once you have a clear plan and measurements, it’s time to prepare the site for construction. Begin by clearing any obstacles, such as rocks, debris, or vegetation, from the area where the ramp will be installed. Next, level the ground and ensure that there are no uneven surfaces that could cause issues during construction.
After the site is cleared and leveled, mark the area where the ramp will be constructed using a chalk line or string. This will help you align the formwork and ensure that the ramp is built straight and perpendicular to the ground. With the site ready, you can now proceed to formwork construction.
Constructing the Formwork
Formwork is essential for shaping and supporting the concrete as it sets. To construct the formwork, you’ll need:
One-by-six wood planks
Nails
A hammer
Stakes
Measure and cut the wood planks to the desired length and width of your curb ramp, ensuring they are wide enough to accommodate the tires of your car.
Next, secure the wood planks in place by hammering stakes into the ground along the perimeter of the ramp area. This will create a solid framework for the concrete to be poured into. After setting up the formwork, you can proceed to mix and pour the concrete.
Mixing and Pouring Concrete
With the formwork in place, it’s time to mix and pour the concrete. The optimal concrete mix for constructing a curb ramp consists of:
1 part Portland cement
1 1/2 parts gravel
1 part sand
1/2 part water
The concrete should form a cohesive ball that does not ooze out any water or become too crumbly.
Begin pouring the concrete at the top of the curb ramp, and work your way down, ensuring that the concrete is evenly distributed and free of any air pockets. Use a 1/4-inch radius edging tool to edge all outside edges and joints, and finish the surface with a wooden float.
After pouring the concrete and smoothing the surface, let it dry for 24 to 48 hours before moving to the final step of surface finishing.
Finishing the Surface
The final step in constructing your concrete curb ramp is finishing the surface. This involves creating a smooth, non-skid surface that will ensure safe and easy access to your driveway. To achieve this, use a wood or steel float or a rough texture created by a screed or wood float.
After the surface is finished, allow the concrete to cure for approximately 30 days before using the ramp. This will ensure that the concrete has reached its full strength and is ready to support the weight of your vehicle.
With the surface complete, your concrete curb ramp is now ready to provide a straight edge, smooth and safe transition from the curb to your driveway.
Customizing Your DIY Curb Ramp for Specific Needs

Your DIY curb ramp need not conform to a one-size-fits-all approach. Depending on your specific needs and requirements, you can customize your ramp to better suit your driveway or sidewalk configuration. This could involve adjusting the size and style of the ramp, integrating it with existing landscaping features, or installing edge protection along the ramp runs and landings.
Customizing your curb ramp requires considering factors like:
Vehicle scraping
Potential flooding issues
Permissible maximum ramp grades
Headroom requirements
Sufficient acceleration and merge distances
By taking these factors into account, you can create a curb ramp that not only meets your specific needs but also ensures safe and easy access for all users.
Safety Considerations and Legal Compliance
While building your DIY curb ramp, ensuring that it adheres to safety standards and legal regulations is vital. This includes:
Providing a ramp width of at least 36 inches
Installing railings if the ramp rises more than 6 inches
Ensuring a cross slope of the ramp run of no more than 2 percent
Along with adhering to safety standards, complying with the Americans with Disabilities Act (ADA) requirements is also necessary while constructing a curb ramp. This involves ensuring a proper slope, width, and landing dimensions, as well as incorporating detectable warning surfaces (DWS) with truncated domes.
By adhering to these safety and legal guidelines, you can create a curb ramp that is not only functional but also safe and compliant.
Maintenance and Longevity Tips for Your DIY Curb Ramp
Regular maintenance and necessary repairs are required to guarantee the durability and longevity of your DIY curb ramp. Common issues that may arise include sliding or movement, corrosion, and damage to the concrete. To address these issues, secure attachment and anchoring should be ensured, corrosion-resistant materials should be used or protective coatings should be applied, and regular inspections and repairs should be done on the concrete.
Furthermore, weather conditions can have a significant impact on the longevity of DIY curb ramps. Therefore, materials that are resistant to such conditions should be employed, such as durable plastics or concrete. Additionally, a sealant or coating should be applied to the ramp to protect it from moisture and UV damage. By following these maintenance and longevity tips, you can ensure that your DIY curb ramp remains in top condition for years to come.
Why a Rubber Curb Ramp is the best option
Though concrete, wood, and steel curb ramps can aid in garage access, they may not be the most suitable option for all situations. In many cases, a rubber curb ramp is the best choice for most driveways, offering a durable, easy-to-install alternative that works well for most situations. Rubber curb ramps, such as the CurbMaster EasyMount Driveway Curb Ramp, are designed to provide a smooth transition when entering and exiting rolled curbs, thereby preventing vehicles from scraping.
The following section will detail the many benefits of using a rubber curb ramp, such as durability, safety, and installation ease. If you’re considering constructing a DIY curb ramp for your driveway, it’s worth considering the advantages that a rubber curb ramp can offer.
Pros of Using a Rubber Curb Ramp
Using a rubber curb ramp for your driveway offers several benefits, including:
Increased accessibility for vehicles, providing a smoother driving experience over curbs
Improved traction for secure passage
Capability to support heavy vehicle weight
Long-term durability
Additionally, rubber curb ramps have the following benefits:
Simple to install
Can be utilized for a variety of applications
Lightweight
Can be conveniently positioned and secured in place without the need for specialized tools or skills
With all these benefits in mind, it’s clear that a rubber curb ramp is an excellent option for most situations.
Summary
In conclusion, constructing a DIY curb ramp for your driveway is a rewarding project that can save you money, protect your vehicle, and improve accessibility. By considering factors such as materials, safety, and legal compliance, you can create a curb ramp that is not only functional but also safe and durable.
Whether you opt for a concrete, wood, steel, or rubber curb ramp, this comprehensive guide has provided you with the knowledge and confidence to tackle your DIY curb ramp project. So, why wait? Start planning your custom curb ramp today and enjoy the benefits of a smoother, safer driveway experience.
Frequently Asked Questions
Can I put a ramp on the curb?
Based on ADA regulations, you can install a ramp on the curb with no greater than an 8.33% slope and uniform consistency from end to end. Exceptions may be available depending on building materials.
Can I use a 2×4 as a car ramp?
Yes, you can use a 2×4 as a car ramp as demonstrated in the video by making a homemade car ramp with 2×4 lumber to do a self oil change. Depending on your vehicle, you can adjust it to the desired height and length to make it easier to drive up.
What can I use instead of car ramps?
For basic maintenance needs, alternatives to car ramps include jacks and axle stands. These are a safer and more reliable solution than car ramps and can be used for many types of repair work.
What are the main materials used for DIY curb ramps?
Concrete, wood, and steel are the main materials used for DIY curb ramps.
How long does it take for a concrete curb ramp to dry and cure?
It typically takes 24-48 hours for a concrete curb ramp to dry, and up to 30 days to fully cure.